
1. Deep learning inference#
Python still dominates model training, but both Rust and C++ are becoming serious options for inference, where Python’s overhead starts to hurt. Large language models (LLMs) such as ChatGPT have multiplied since their debut, and companies and research groups keep releasing new ones, though not all of them are equally useful.
Large image generation models such as Stable Diffusion and Midjourney draw similar attention. LLMs and image generators share one trait: they have billions of parameters and occupy gigabytes of memory.
Privacy is a major concern for LLM users. Most of us would rather not have our data harvested by these systems for free. Open-source models such as LLaMA aim to compete with ChatGPT while keeping user data local. The most private option is to run the model on your own device, but consumer hardware rarely has a powerful enough CPU or GPU. That is why the community has pushed hard on inference speed. llama.cpp, written in C/C++, addresses this with SIMD, quantization, mixed precision, and acceleration on several backends (GPU, MKL, and others). Community contributions have made many popular models runnable through llama.cpp, which puts LLMs within reach of ordinary devices.
While C++ and llama.cpp offer substantial benefits, Rust has its own niche, particularly WebAssembly and web or GUI applications1. Several young but fast-moving deep learning frameworks, such as dfdx, burn, and candle, are written purely in Rust and support multiple accelerated backends across platforms.
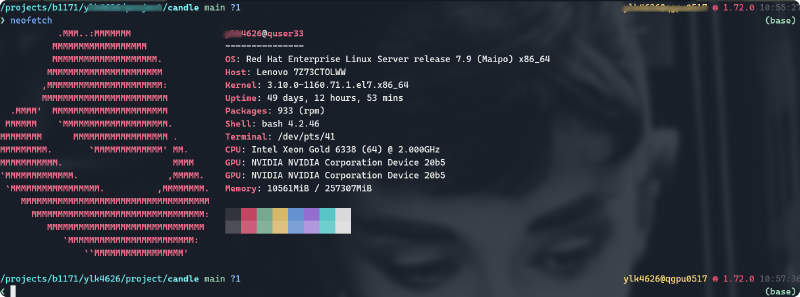
In short, once training is done, deployment can be handled by either llama.cpp or a Rust-based solution, which makes large models accessible on a wide range of devices. My own setup is a MacBook Pro with an M1 chip plus a remote High-Performance Computing (HPC) cluster for CUDA. The figure below shows the HPC setup.
2. Check your CUDA driver version#
I kept running into problems configuring CUDA on the HPC cluster. This post records how I worked around them without administrative rights.
To get a working CUDA environment for Rust and C++, you need to confirm that the CUDA libraries and headers are installed, point the build system at them, and sometimes set compiler flags and paths by hand.
Start by checking the driver:
nvidia-smi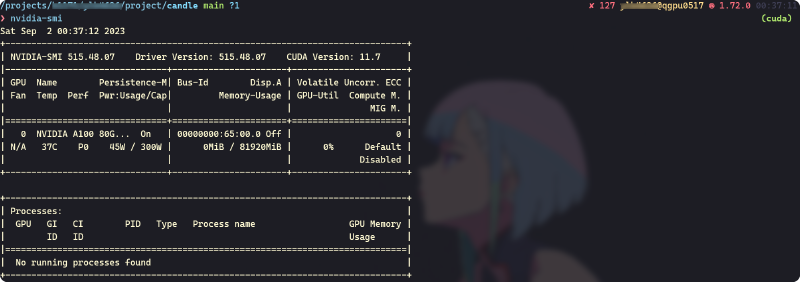
On the remote HPC cluster, the CUDA driver is version 11.7. Without administrative access, we cannot update the driver, so we have to install a matching CUDA 11.7 toolkit.
3. Use conda to install CUDA and gcc/g++#
I recommend mamba over conda because it resolves and installs dependencies much faster.
In the example below, mamba is installed at /home/mambaforge.
/home/mambaforge with your own installation path when you follow along.Create a new environment#
Create a fresh environment to avoid dependency conflicts. Python 3.10 is the current stable release.
mamba create -n cuda python=3.10
mamba activate cuda
Install CUDA#
Install the CUDA package from the nvidia channel, pinning the version with a label.
Here we install CUDA 11.7.
mamba install cuda -c nvidia/label/cuda-11.7.0Install a compiler#
You also need a compatible compiler.
Otherwise the build will fall back to the system default, such as /usr/bin/gcc.
mamba install gcc=11.0 gxx=11.0 cmakeSet the environment variable CUDA_ROOT so that the build can find CUDA.
CUDA_ROOT=/home/mambaforge/envs/cuda RUSTFLAGS="-L/home/mambaforge/envs/cuda/lib/stubs" cargo run
CUDA_ROOT=/home/mambaforge/envs/cuda g++ -o test test.cpp
To avoid setting CUDA_ROOT every time, store it as an environment-specific variable.
mamba env config vars set CUDA_ROOT=/home/mambaforge/envs/cuda
mamba env config vars set RUSTFLAGS="-L/home/mambaforge/envs/cuda/lib/stubs"
Reactivate the environment so the variables take effect.
mamba activate cuda4. Quick start for candle#
candle is a deep learning framework written in Rust, a language that is particularly strong for WebAssembly. Mature full-stack WebAssembly libraries such as leptos and dixous reinforce that strength. If you want to build a web application backed by deep learning, Rust is a strong choice. Let’s try candle with CUDA.
cargo new test_candle
cd test_candle
Add candle as a dependency with the CUDA feature enabled.
cargo add candle_core --features cudaEdit src/main.rs and run a first test on the CPU.
use candle_core::{Device, Tensor};

fn main() -> Result<(), Box<dyn std::error::Error>> {
    let device = Device::Cpu;

    let a = Tensor::randn(0f32, 1., (2, 3), &device)?;
    let b = Tensor::randn(0f32, 1., (3, 4), &device)?;

    let c = a.matmul(&b)?;
    println!("{c}");
    Ok(())
}
cargo runNow switch to the GPU.
use candle_core::{Device, Tensor};

fn main() -> Result<(), Box<dyn std::error::Error>> {
    let device = Device::new_cuda(0)?;
    let a = Tensor::randn(0f32, 1., (2, 3), &device)?;
    let b = Tensor::randn(0f32, 1., (3, 4), &device)?;

    let c = a.matmul(&b)?;
    println!("{c}");
    Ok(())
}
$ cargo run
[[ 0.6323, -0.8924, 0.7706, 2.3862],
[-0.1840, 0.1122, -0.3946, -0.9851]]
Tensor[[2, 4], f32, cuda:0]

Try more candle examples#
git clone https://github.com/huggingface/candle.git
cd candleWhisper#
Assuming CUDA_ROOT and RUSTFLAGS are already set in the environment:
cargo run --example whisper --features cuda --releaseAlternatively, set them just for this command.
CUDA_ROOT="/home/mambaforge/envs/cuda" RUSTFLAGS="-L/home/mambaforge/envs/cuda/lib/stubs" cargo run --example whisper --features cuda --release
Stable Diffusion#
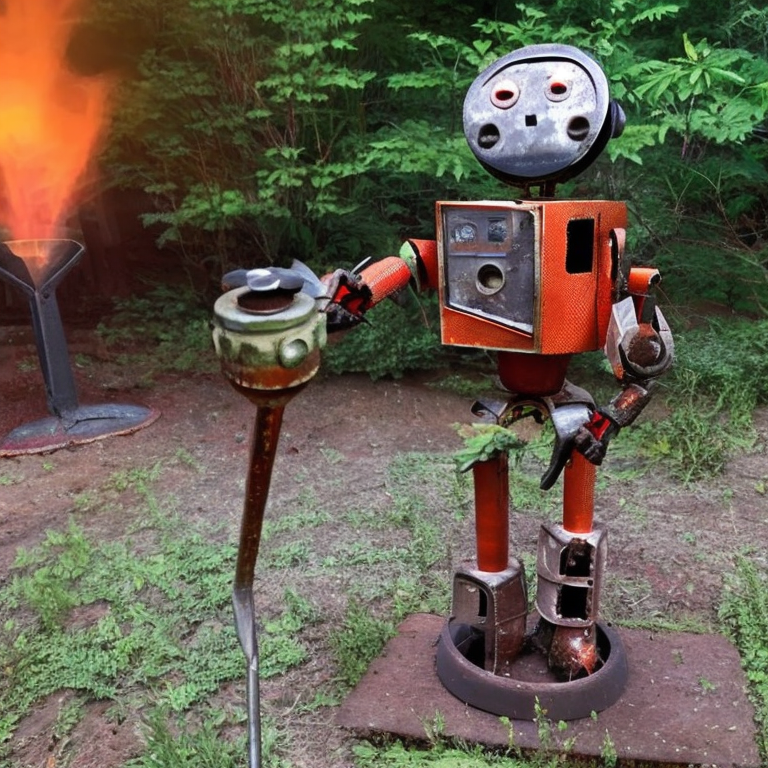
cargo run --example stable-diffusion --release --features cuda -- --prompt "a rusty robot holding a fire torch"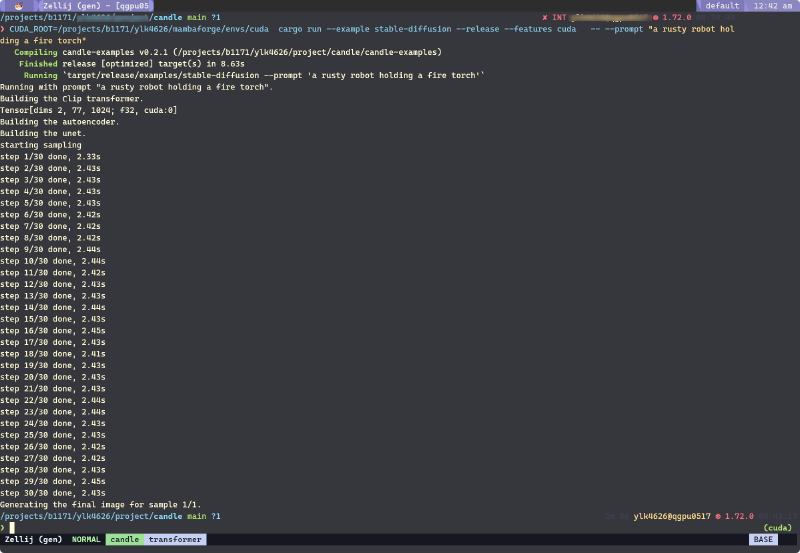
The generated image:
5. Bonus#
This bash script requests an interactive compute node through slurm.
Change -p b1171 --account=b1171 to your own partition and account before using it.
#!/bin/bash
set -e
set -u
set -o pipefail

# Set default values
use_gpu=0
gpu_number=1

# Display help message
display_help() {
        local script_name=$(basename "$0")
        echo "Usage: $script_name <time> <memory> [gpu_number]"
        echo
        echo "   time         The time parameter value in hours"
        echo "   memory       The memory parameter value in GB"
        echo "   gpu_number   The number of GPUs (default: 1)"
        exit 1
}

# Check if both parameters are provided
if [ "$#" -lt 2 ]; then
        display_help
fi

time="$1"
memory="$2"

# If third parameter exists, assign its value to gpu_number and set the use_gpu flag
if [ "$#" -ge 3 ]; then
    gpu_number="$3"
    use_gpu=1
fi

echo "Time: $time hours"
echo "Memory: $memory GB"

if [ "$use_gpu" -eq 1 ]; then
    echo "Using GPU with GPU Number: $gpu_number"
    srun -n 8 -p b1171 --account=b1171 -t ${time}:00:00 --gres=gpu:a100:$gpu_number --mem ${memory}g --pty bash
else
    echo "Using CPU only"
    srun -n 8 -p b1171 --account=b1171 -t ${time}:00:00 --mem ${memory}g --pty bash
fi
6. Caveat#
You may hit this linker error:
undefined reference to `memcpy@GLIBC_2.14'Check the glibc installed in the conda environment:
$ mamba list | rg sys
sysroot_linux-64          2.12                he073ed8_16    conda-forge
It turns out that conda ships GLIBC_2.14 regardless of the compiler version.
The workaround is to use module instead.
Check the available CUDA versions:
module spider cudaLoad a CUDA module that matches your compiler:
module load cuda/gcc-11.3.07. Q & A#
Why not just use module load?
module load is great, but we cannot control everything. Installing CUDA into a conda environment keeps the toolchain reproducible and independent of what the cluster admins ship.